Sunday, 6 April 2014

April Open House

CLASSES -

We are holding two really interesting classes this year at the Open house, both of which are more than half full already! But if you would like to join us here is a little information.....


We have two fabulous teachers lined up... Charlotte Rosser from Wild Strawberry Designs and Rebecca Anderson from Songbead and The Curious Bead Shop. There has been such a great response to the classes already, even before I had advertised the details customers were asking to be signed up. Thankfully we do have about 4 or 5 spaces left in each class so if you are interested please get in touch asap.........However, please, please do read the information underneath before you contact me to book, we want you to make sure that the classes are right for you. I am asking for payment via PayPal at the time of booking to ensure your place. 

Each class will have a maximum of 12 students and will last approximately 1 1/2 to 2 hours, all the materials are included and the specialist tools will be provided for you to use (you will need to bring flat and round nose pliers for the Deco Rose class).

DECO ROSE CLASP
Class fee - £15
Teacher  - Rebecca Anderson


 Friday 25th - 1.30pm
Saturday 26th - 11am
Classes will start promptly please make sure you arrive half an hour early.

We aim for you to complete at least one clasp maybe two and to learn how they can be embellished with tiny beads. You will be using antique finish copper wire as we are unable to use raw copper and age it during the class (it's a bit too smelly). However Rebecca will be happy to explain the process to you. Wire and small beads for embellishment will be supplied. Bail making pliers, hammers and blocks will be provide but you may need to share with your neighbour (If you have your own please feel free to bring them with you) For this class you will need to bring your own round nose and flat nose pliers (contact me if this is not possible I'm sure we can sort something out). We suggest that you mark your own tools before arrival so that they don't get mixed up with ours.

NB. You are free to remake the deco rose clasps for resale within your own jewellery, but not as a single item ie. you may make one and use it in a bracelet to sell but not the clasp by itself.  We ask that you please give credit to Rebecca Anderson as designer if using this design within your jewellery. The instruction sheets are for your own personal use and we ask that you do not reproduce them for resale or distribution in any way.


RIZO SEA URCHIN (and beaded bead)
Class Fee - £15
Teacher - Charlotte Rosser


Friday 25th - 11 am
Classes will start promptly so please make sure you arrive half an hour early

During this class you will learn to make at least one Sea urchin bead using seed beads and Rizo beads plus another beaded bead design if there is time. Each student will have their own little pack of coordinating beads to work from. Beading needles, bead mats and thread will be provided. Instruction sheets will also be provided for each bead design. 

NB. You are welcome to use the skills you have learnt in whatever way you would like but we ask that you do not reproduce the instruction sheets for resale or distribution in any way.

If you would like more information or to book onto either of the classes please email me (Claire) at:  

I look forward to hearing from you.
Claire
x

Sunday, 23 March 2014

Spring Open House - April 2014

Hear ye, hear ye, calling all bead lovers.....It's time for the Smitten Open House again!


Once or twice a year I like to open my home to all you lovely beaders for a good old session of buying beads, eating cake, getting to know other beaders and hopefully having a giggle or two. We had so much fun at the last show in October that this year I have decided to have a Spring show rather than wait until the end of the year. Well I can't wait and boy do we have an exciting show planned - Apart from the usual Smitten goodness we will have 4 Artisan bead stalls with us, demonstrations in wire work and lamp work, for the first time we are going to be running 2 classes and as if that's not enough we are on for an extra day!

Has that whetted your appetite, would you like to know more about our artisan bead stalls? Then keep reading.......

 BO HULLEY BEADS
I'm happy to say that back with us for another year will be Bo Hulley Beads, some of you may already know about Teresa's lovely ceramics as we sell a range on the Smitten website. Well this will be your chance to have a look at her latest ceramic creations here on the mainland as she will be winging her way over from the Isle of Wight to be with us. Here is a little taster....

 Bo Hulley Beads - Heart Headpins

 Bo Hulley Beads - Ceramic Shards

 
Bo Hulley beads - Owl pendant


 PIPS
Travelling a slightly shorter distance, Pippa from Pips will also be selling her polymer clay components again this year. We will be treated to a stall full of her amazing creations, I can't wait to stock up! Here are a few examples of her latest designs...

Pips - Snow drop pendant

Pips - Bunny pendant

Pips - Bird house beads


EARTHSHINE BEADS
Linda from Earthshine will be having a stall for the the first time this year, she's a wonderful addition to our merry band as she makes the most beautiful lamp work beads, her flower headpins are to die for! She will also be demonstrating lamp work bead making which is a treat not to be missed!

 Earthshine - Flower headpin sets

 Earthshine  - lamp work heart bead 


THE CURIOUS BEAD SHOP
(HANDMADE)
Another new face for this year is Rebecca Anderson from Songbead and The Curious Bead Shop. Flying in! from Belfast, Rebecca will be selling her stunning handmade findings in addition to teaching a class. Here are just a few of her antique copper pieces..

 The Curious Bead Shop - Heart pins

 The Curious Bead Shop - Contemporary earwires 

The Curious Bead shop - Edison Hook Clasps

If you would like to come to the open house on the 25th and or the 26th 
please email me at: claire@smittenbeads.co.uk to be added to the guest list. 
Invitations with details and directions will be emailed about 10 days before the event.
Please note that as the show is in my home the event is by invitation only.

Well that's it for today, 
My next post will have information about our CLASSES and how to book! 

Claire xx


Sunday, 23 February 2014

Spring Fever Design Challenge

If you're feeling a little gloomy and fancy the chance to take part in a little challenge to pull you singing and dancing into spring, then pop over to the Gossipping Goddess blog. Lesley of THEA Elements and Caroline from Blueberri Beads have a fabulous challenge afoot with a combination of ceramic beads cheerful enough to lift the darkest day....Oh and you might find a little bit of my sari silk in there too!

http://thegossipinggoddess.blogspot.co.uk/2014/02/spring-fever-design-challenge.html

Saturday, 11 January 2014

New Inspiration pack

This is a speedy post just to show off the new inspiration packs that will be added to the Smitten website tomorrow, I hope you like them, most were inspired by my recent visit to Cornwall and the Jewellery I made there :) ..

 Cornish Cream Tea

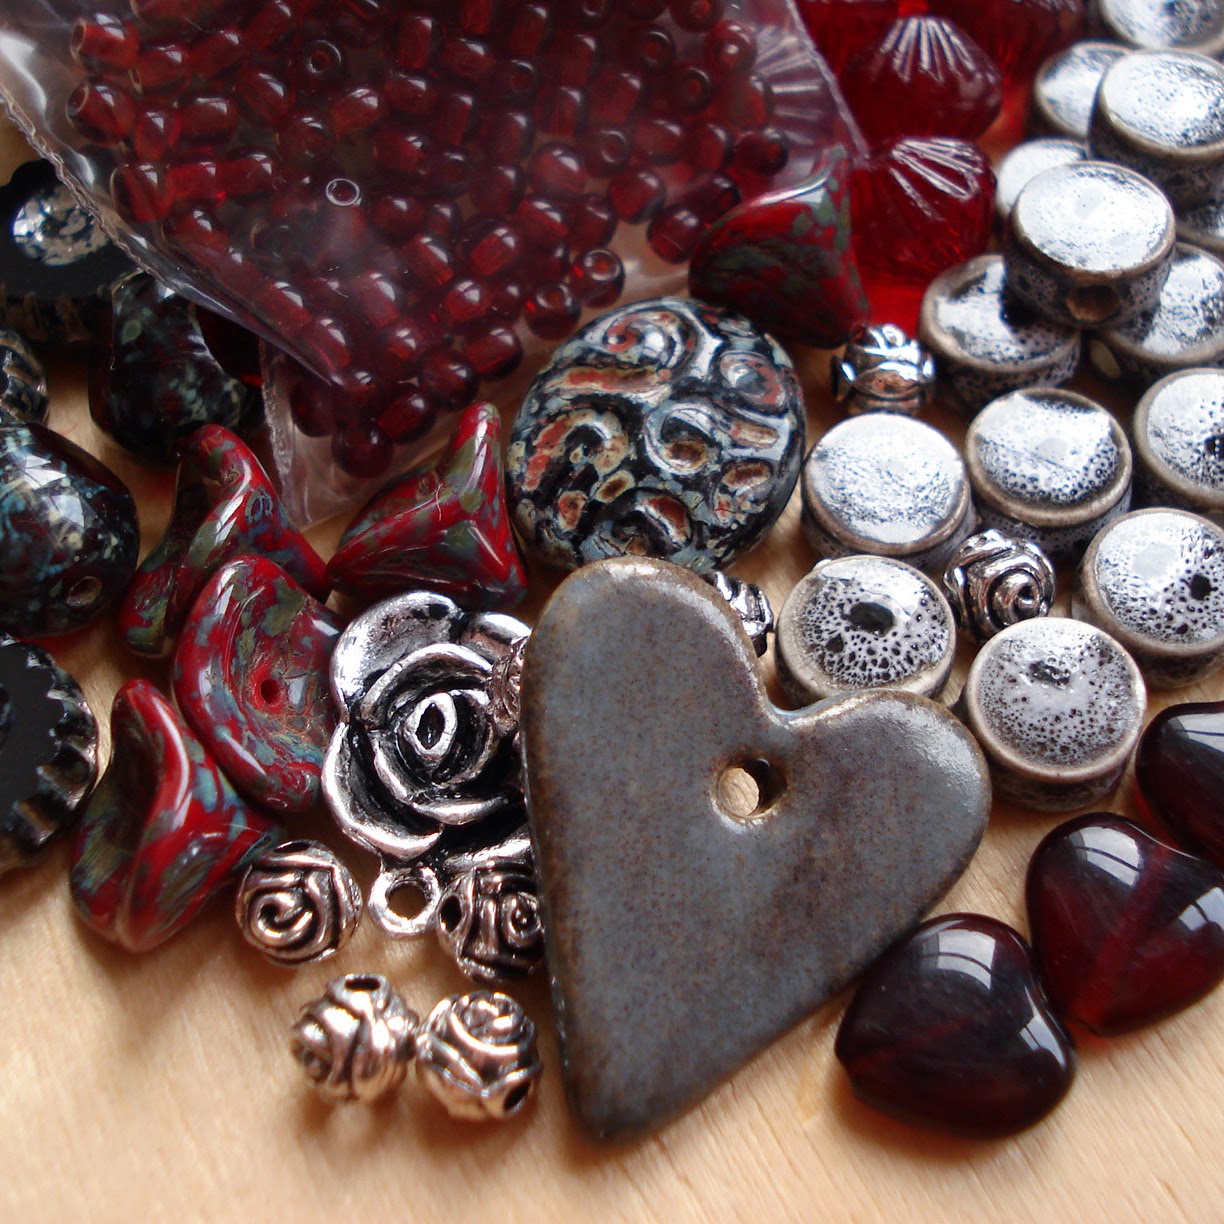
Dark Heart

Bridesmaids Posy

Somewhere in Time
 

Verdigris

Peach Blossom

Mint Julep

 That's all for today folks 
Claire x

Tuesday, 10 December 2013

A Cornish Inspiration Part 3

The Designs

So here we go then... here is how the images of the beautiful Cornish countryside swirled around in my brain and emerged as pieces of jewellery. Most of the jewellery I've made over the last year has been designed with either antique brass or copper but as we have some lovely antique silver plated beads on the website I decided to go back to using it for most of the pieces I made in Cornwall. 90% of the components I've used can be found on the Smitten website. I did however take a few Artisan beads with me made by some of my very talented beading friends, I've popped links in the descriptions for these where used.

Beachcomber Bracelet
My first piece really was a combination of all the colours and shapes from my holiday and I think it's the one I'm most pleased with.

A Tranquil Moment
I've been waiting for a chance to use some of the tiny 3mm pressed glass rounds and the gorgeous sari silk we sell, I've teamed it up with two metals (I love mixing copper and silver) but this time I've gone with antique silver and the antique silver grey.

Retreating Tide
I'm so pleased with this necklace as it incorporates so many of my favourite beads, the inspiration came from the millions of mussels we saw at all the beaches we went to. The Dark River lentils reminded me of the mussels in the image and everything else is a bit of a seaweed homage - The red Irish waxed cord (red seaweed), the bead frames with fizgig centre (seaweed pods) and the oh, oh, oh so lovely new JBB clasp as it also reminded me of seaweed pods. I've split the clasp and used the tulip part as a pendant and teamed the hook up with a simple silver ring.

A Curious Find
I spotted the little pile of stones in the picture above carefully placed by an earlier visitor to Bedruthen Steps, a photo op that had to be taken. I've used the plum fairy sari silk, antique brass wire, dark copper and a Vintaj component along with some of the gorgeous tiny 1x2mm crystals. The beautiful handmade Rose Clasp (thank you Rebecca) and the pressed glass flowers are from one of my favourite shops The Curious Bead Shop. I plan to add a strand of peanut beads to the sari silk but I'm still trying to decide which colour to use.

Along the Sea Shore
One of the things I wanted to do while on holiday was make some pieces up with the Antique silver grey components and our new honey yellow resin beads, I can't really say this one was inspired by the sea shore but rather the idea formed along with the others designs as I was walking along this beautiful beach.

Flotsam & Jetsam
Everything in this one is from Smitten except the beautiful lamp work bead by Rita from Avalon Designs and the gorgeous lace which is from my own collection of lace and ribbons. I changed the designs about 10 times before I felt that I had got it right!...although I may still stain the lace to be more seaweed coloured.

Well there we are then. If you would like to know more about any of the beads I've used please feel free to get in touch here, on facebook or via the website.

Next on Smitten....
I've already written my next post, actually I wrote it last Christmas but a little too late for posting. Christmas decorations are the topic which will coincide beautifully with the Christmas ornament swap that's currently going on in the Bead Smitten facebook Group.

Thank you for reading. I hope you enjoyed my holiday.
Claire
x


Wednesday, 4 December 2013

Countdown to Christmas


This week I will be buying the largest Christmas tree I can afford and shall begin to deck the Braunbarth halls! This is the third year that I have been able to take it a little easier in December, most of my lovely customers have done their big bead shop for their Christmas makes so December sees smaller top up orders and gives me some time to create, I love it! Proper time to prepare, I may even bake and I am NO baker!

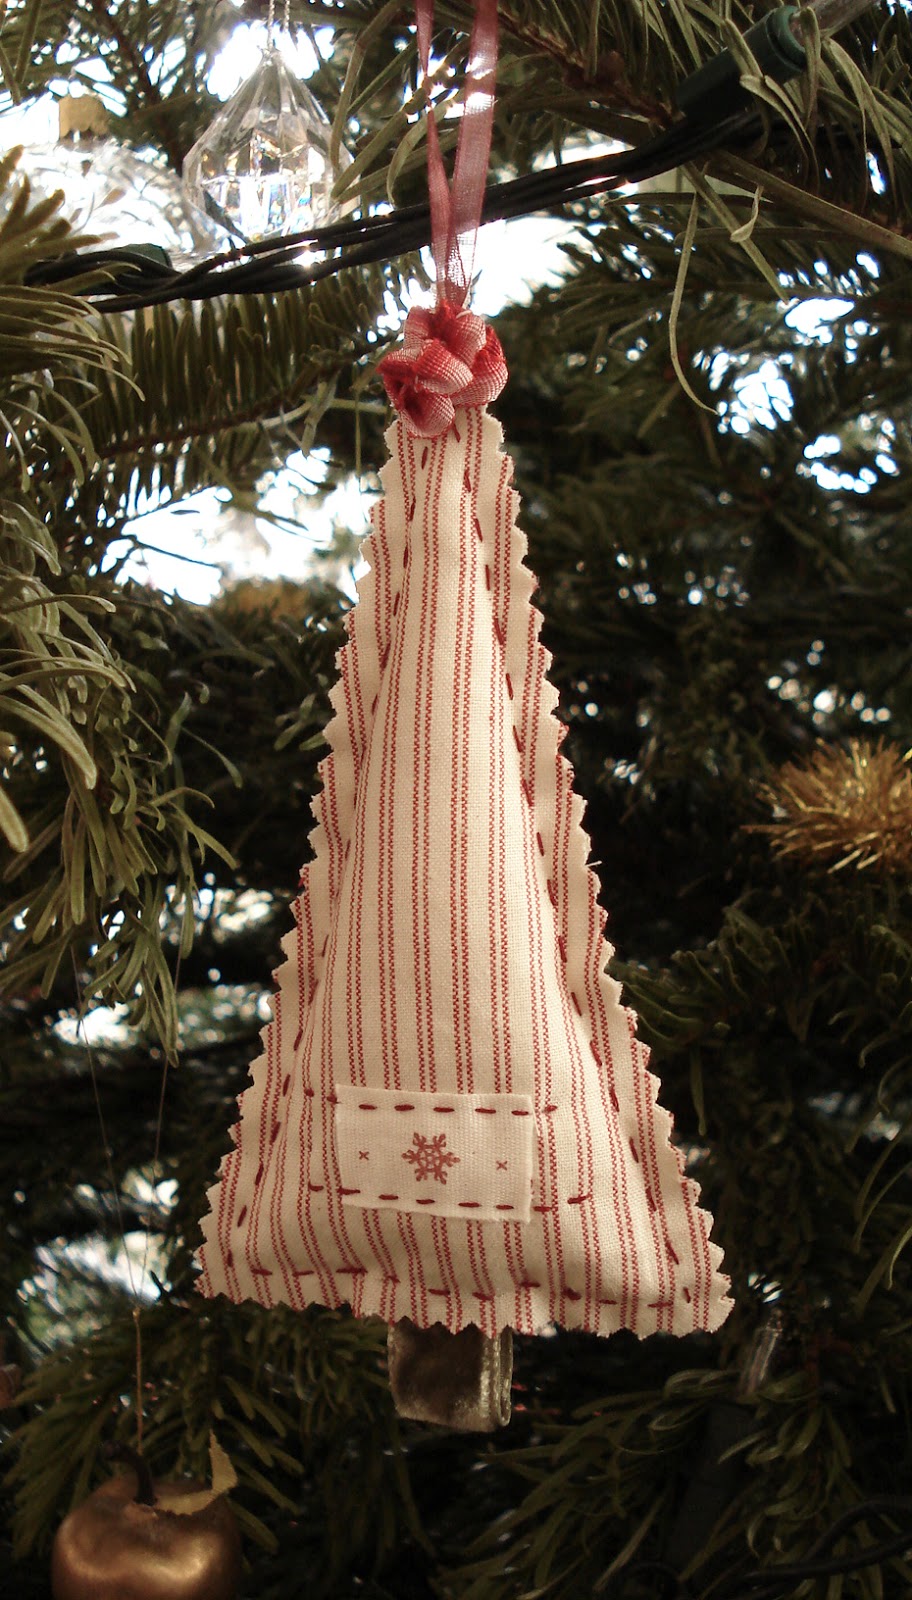
As often as I have been able, at Christmas I make! Whether it be new decorations, Christmas cards, jewellery as a gift or at the very least some creative present wrapping. The more time I have the more I will make it’s a great way to spread the Christmas period out for as long as possible.Here are couple of my Christmassy makes from last year


My fire place Garland
 
 Hearts and trees that I attached to cards for my Family Christmas cards


I thought I would share with you one of my favourite little makes for Christmas - bead decorations using ribbon wrapped beads. A simple process and all you need is a tapestry needle (blunt ended), ribbon, Fabric Hypo cement glue and large hole beads. 

Ribbon Bead Tutorial 

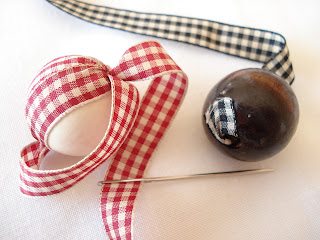
To make you ribbon wrapped beads thread your ribbon onto a darning needle (blunt ended) and pull once through the bead, then secure the end with a small dab of glue (see dark brown bead in image 1). Keep threading the ribbon through the bead pulling tight after every loop, as you work around the bead slightly overlap the last piece of ribbon and work in a clockwise direction until you have completely covered the bead (red gingham bead image 2). As you work around the bead try to make sure that you pull the ribbon tight so that you don’t block the hole, you will need to get a headpin or wire through the bead later on.

When you get close to finishing you may find it difficult to pull the needle through the bead, it may help to use a pair of pliers to pull the needle through. When you have as many strands as you need, secure the last loop of ribbon with a small dab of glue then trim the ribbon as close to the bead as you can.

After the glue has dried push an eye pin through the bead; make sure you go with the ribbon rather than against it ensuring that you don’t push the ribbon just trimmed back through the hole. With a pair of round nose pliers make a loop on the other side and trim the remaining wire. Bead caps are a nice addition. 

Tip - You will need large hole beads for ribbon wrapping, the wider or thicker the ribbon the large the hole needs to be.
  Step 1.

Step 2.

 Some ribbon wrapped beads
using various different sizes and shapes of beads


One of my favourite finished decorations


We have some gorgeous ribbons on the Smitten website as well as lots of beads suitable for wrapping here are some links to the most appropriate....

Beads for wrapping - Frosted acrylics - Large wooden beads
Ribbons for wrapping - Sari silks - 4mm ribbons - 10mm Gingham - 10mm edged - 7mm velvet
Glass and crystal accent beads - 8x6mm donut opaque red - large crystal donuts
Organza ribbons for hanging your ornament - 4mm organza
Bead caps - All bead caps

Enjoy the festive season everyone!

Sunday, 17 November 2013

A Cornish Inspiration part 1

 Collecting images at Bedruthen Steps.

At the beginning of this month I was lucky enough to grab a weeks break with my husband and head off down to the Cornish coast. Our plan was to chill out with some coastal walks, a garden or two, some lovely food and maybe the odd alcoholic beverage. We knew that an October break would be a little risky but the weather this year has been as fine and mild as any I can remember so we thought we would take a chance...... My husband Auri is partial to throwing himself out of a plane on occasion so we agreed to take a day out of the holiday, he would skydive and I would keep my feet very firmly on the ground and surround myself with my lovely beads in hope the Cornish landscape would work its magic and inspire my makes.... Well our holiday didn't go quite according to plan, I think we managed to pick the 6 rainiest days of the year and beautiful rugged Cornwall looked a little more like a tropical Island being battered by a hurricane! It poured...and poured...and poured... and then it poured a little more. Sadly for Auri that meant the skydiving was off the menu ....but for me it was a slightly happier situation - 3 solid days of making jewellery! How awful! ;) We were incredibly lucky though, when we did venture out we managed to dodge the rain almost completely and even saw the sun at the most opportune moments - On the Cliffs at Polperro and down on the beach at Bedruthan Steps, maybe only for an hour at a time but all the more beautiful and precious as it was so rare.

Here is my first set of photos from Bedruthen....


 Our first full day in Cornwall, we managed to get down onto Bedruthen beach at just the right time, 
Auri took this picture see if you can spot me!

We spent an hour or so on the shore before the tide started to come in, I was looking for inspiration and boy did I find it in this next set of close ups. 
These were a huge inspiration to me when I sat down to make my jewellery as you will see.


Bedruthen Steps really is one of my favourite places on the planet.
 The 180 steps down to the beach were quite a challenge for me but worth it for every second we had there, for most of the time we had the beach to ourselves.


The stunning cliff walk....


 Look closely that's my leg in the background this fabulous fungi was huge!


.....and right next to it we found this one....


Just as we got back to the National Trust tea shop at the top of the cliffs (for a gorgeous brie and mushroom toasted sandwich which I highly recomend) the weather turned and so began 3 days of making, If you would like to see what I came up with and the photos from our second lucky break in the weather at Polperro then stay tuned for parts 2 & 3.

Thanks for visiting
Claire x